Handy Crimper
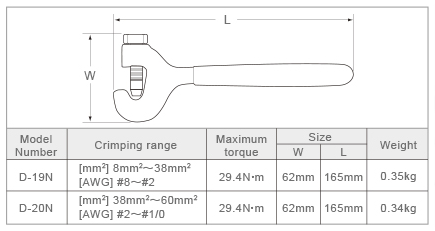
Handy Crimper D-19N / D-20N
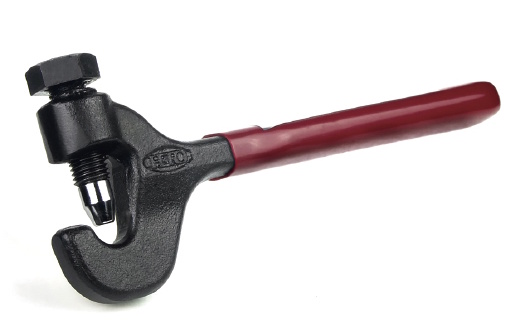
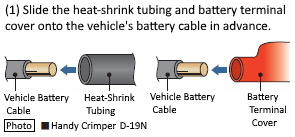
Handy Crimper D-19N
Crimping Range: 8 mm² – 38 mm² (AWG #8 – #2)
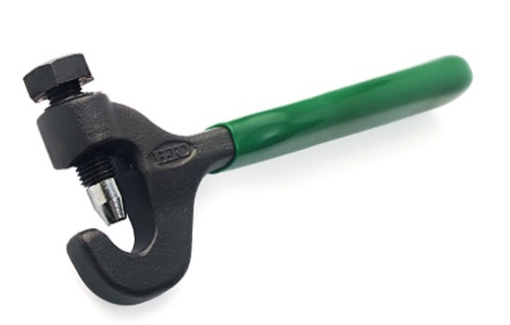
Handy Crimper D-20N
Crimping Range: 38 mm² – 60 mm² (AWG #2 – #1/0)
By returning to our unchanging core philosophy—“Improving On-site Work Efficiency”—Hero Electric created this gem of a tool from the ground up, free from conventional ideas of what a crimping tool should be. It marks a return to our foundational principle: enhancing the efficiency of on-site work—an unwavering commitment we have upheld since our inception. Designed to make crimping thick wires—once considered a difficult task—surprisingly easy, it delivers significantly improved operational efficiency compared to traditional crimping tools. As a result, it has earned high praise from professional technicians working in the field of automotive maintenance.
"MADE IN JAPAN" – a mark of trust and reliability
As a symbol of trust and reliability, “MADE IN JAPAN” reflects our unwavering commitment to domestic production—from design to manufacturing—and our pursuit of exceptional product reliability.Since its launch in 1999, this tool has earned high praise from on-site professionals, especially in the automotive industry, for improving the efficiency of terminal crimping work in tight spaces such as engine compartments.

Product Development Centered on Unleashing Maximum Work Performance – We focus our product development efforts on enabling users to fully demonstrate their work performance to the fullest.
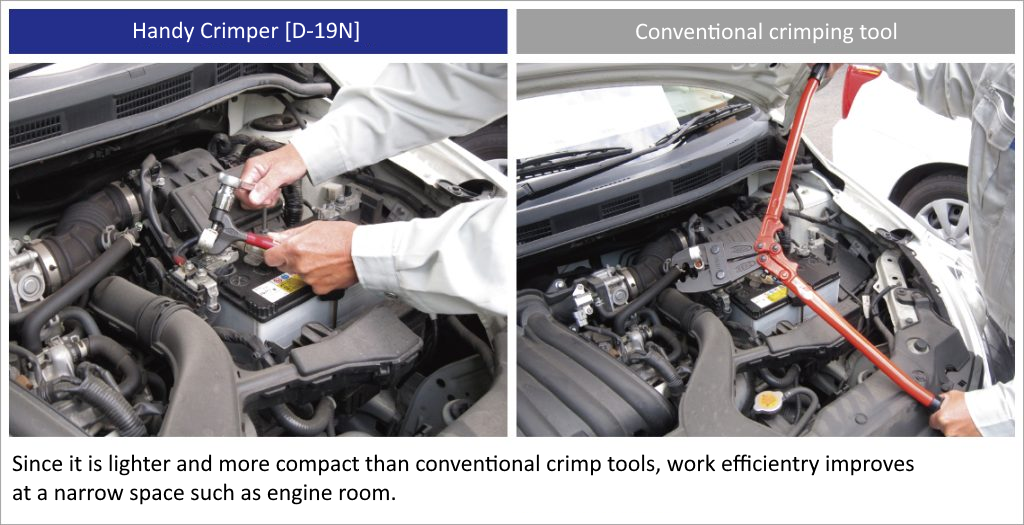
Compared to traditional manual crimpers widely used in automotive maintenance, this model is dramatically smaller and lighter, resulting in a significant boost in usability. With a total length of just 165mm and a weight of only 350g (D-19N), it fits comfortably in a toolbox and allows for smooth operation even in tight spaces like engine compartments.
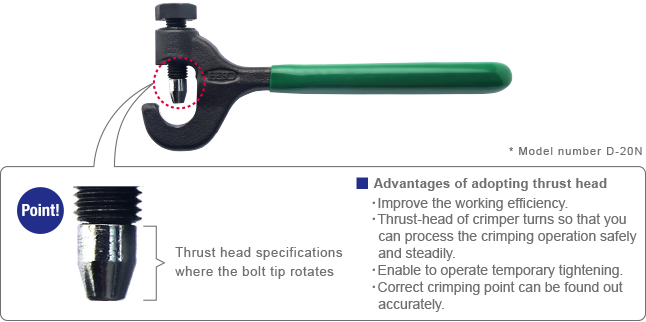
The Game-Changing "Thrust Head" That Redefines Crimping
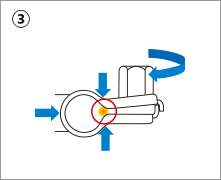
When crimping terminals, a tightening method using a 17mm socket wrench is employed to reduce the physical burden on the operator during the crimping process.In addition, the crimping bolt adopts Hero Electric’s proprietary “Thrust Head,” developed based on the company’s extensive know-how cultivated over many years in the automotive aftermarket.The Thrust Head features a rotating tip piece, which enables easier and smoother terminal crimping.


One-Point Advice for Using Oxygen-Free Copper (OFC) Battery Terminals
At Hero Electric, we have consistently upheld our core philosophy of “Perfect Wiring for Perfect Maintenance” since our founding. Based on this principle, we recommend the crimping method for connecting wires and terminals, as it ensures secure and stable contact over long periods of use.
By using the handy crimper "D-19N" and "D-20N," the tensile strength of the crimped area satisfies the standard defined by the Society of Automotive Engineers of Japan (JASO), specifically "JASO D616: Minimum Tensile Strength of Conductor Crimped Parts."JASO D616 is a specification used in the automotive industry to ensure the quality and safety of conductor crimped connections.Meeting this standard indicates that the crimped area possesses the required tensile strength and delivers a highly reliable electrical connection.
Cross-Sectional Analysis of Crimped Sections for Oxygen-Free Copper (OFC) Battery Terminals (DCPL and DCPS Series)
Both D-19N and D-20N meet the JASO standard for minimum tensile strength of conductor crimped parts.
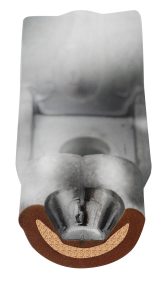
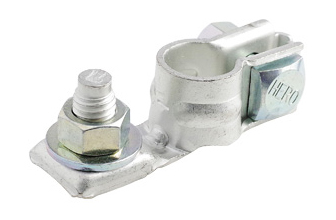
Oxygen-Free Copper (OFC) Battery Terminal
(Terminal Side)
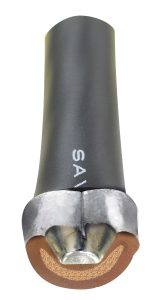
Oxygen-Free Copper (OFC) Battery Terminal (Wire Side)
By securely and safely performing the installation (crimping) of battery terminals and wires, the battery can fully deliver its intended performance.
Vibrations generated by a car's engine and during driving can affect the connection between battery terminals and wires. Loose connections may cause contact failure, resulting in voltage drops, battery drain, or even malfunctions in electronic devices. Therefore, a secure connection between the wire and terminal is extremely important.
[Reference] JASO Standard: Industrial standards established by the Society of Automotive Engineers of Japan (JSAE)
Hero Original Handy Crimper

| Photo | Products | Parts number | Standard specification | Applicable Tools |
|---|---|---|---|---|
 |
Oxygen-Free Copper (OFC) Battery Terminal (Crimp Type) | DCPS22-1 | Small Pole (B-Type Terminal) – Positive Terminal Applicable Wire Size: 22.00 mm² [approx. AWG 4] |
D-19N |
| DCPS22-2 | Small Pole (B-Type Terminal) – Negative Terminal Applicable Wire Size: 22.00 mm² [approx. AWG 4] |
|||
 |
DCPL38-1 | Large Pole (D-Type Terminal) – Positive Terminal Applicable Wire Size: 38.00 mm² [approx. AWG 2] |
D-19N D-20N |
|
| DCPL38-2 | Large Pole (D-Type Terminal) – Negative Terminal Applicable Wire Size: 38.00 mm² [approx. AWG 2] |
|||
 |
DCPL60-1 | Large Pole (D-Type Terminal) – Positive Terminal Applicable Wire Size: 60.00 mm² [approx. AWG 1/0 (1 aught)] |
D-20N | |
| DCPL60-2 | Large Pole (D-Type Terminal) – Negative Terminal Applicable Wire Size: 60.00 mm² [approx. AWG 1/0 (1 aught)] |
|||
 |
Ring Terminal (Closed Barrel) | DR8-5 | Wire Accommodation Range (Stranded Wire): 6.64mm²–10.52mm² (approx. #10–#8 AWG) | D-19N |
 |
Butt Splice Terminal | DC-38 | Wire Accommodation Range (Stranded Wire): 26.66mm²–42.42mm² (approx. #3–#1 AWG) | D-19N D-20N |
 |
Parallel Splice Terminal | DP-22 | Wire Accommodation Range (Stranded Wire): 16.78mm²–26.66mm² (approx. #5–#3 AWG) | D-20N |


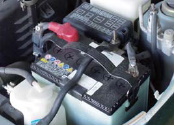
Installation Example
Vehicle Model
Daihatsu Mira Gino (Model: L700)
Replacement Products
Oxygen-Free Copper (OFC) Battery Terminal
(Parts No.: DTPS-2S)

Step 1 Prepare Necessary Components Including Battery Terminals
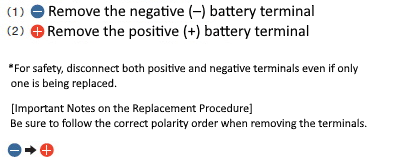
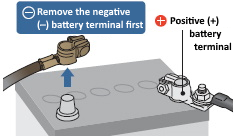
Step 2 Remove Battery Terminals
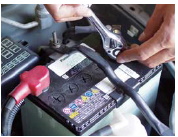
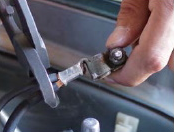
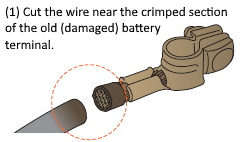
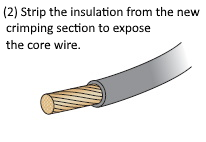
Step 3 Cut the Wire
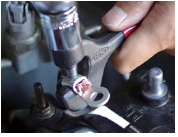
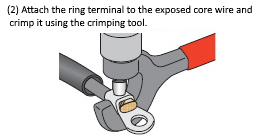
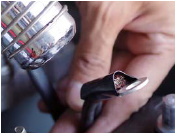
Step 4 Crimp the Terminal and Prepare
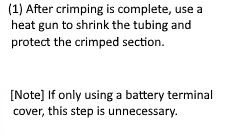
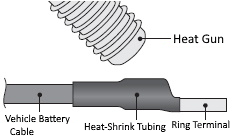
Step 5 Protect the Crimped Section with Heat-Shrink Tubing (Only if Using Heat-Shrink Tubing)
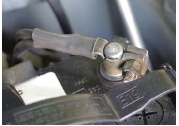
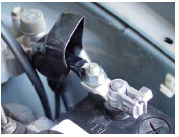
Step 6 Reattach the Battery Terminals
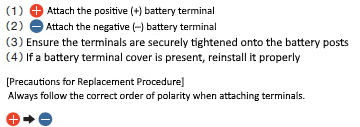
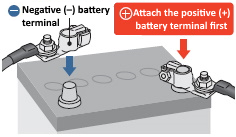
Quick Tip for Installing an Oxygen-Free Copper Battery Terminal onto a Lead-Acid Battery Post
*The illustration above shows the bolt-type specification.
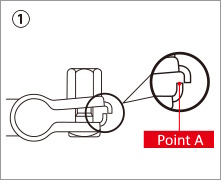
- Firmly insert the oxygen-free copper (OFC) battery terminal onto the post of the lead-acid battery.
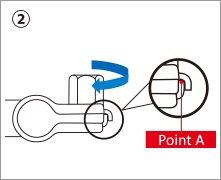
- Tighten the M6 nut until Point A comes into contact with the opposite surface.
- By further tightening the M6 nut, Point A acts as a fulcrum, causing the oxygen-free copper battery terminal to clamp securely onto the post of the lead-acid battery.(The fulcrum effect ensures that the oxygen-free copper terminal is firmly and reliably fixed in place.)
- Immediately after installation, check for any looseness.
- Periodically inspect to confirm that the oxygen-free copper battery terminal remains securely tightened.
 | When installing the oxygen-free copper battery terminal,always check that there are no abnormalities on the post of the battery (lead-acid battery).Also, please make sure not to touch the battery fluid under any circumstances. |


